Precautions for Replacing the Toilet Flush Valve
Replacing a toilet flush valve is a relatively simple home maintenance task. Here are some tips to ensure a smooth replacement process:
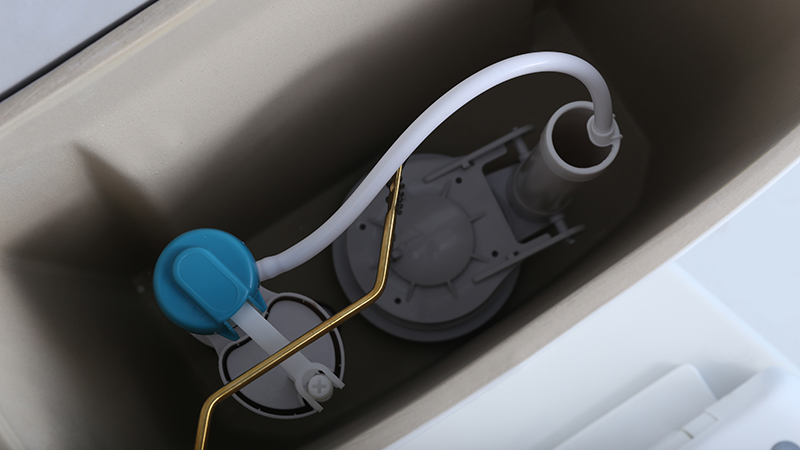
1.Observe and understand the type of toilet flush valve: Before replacing the toilet flush valve, observe and understand the type of toilet flush valve currently in use. Different types of toilet flush valves may have different installation methods and operating procedures.
2.Shut off the water supply valve: Before starting the replacement process, it is necessary to shut off the water supply valve near the toilet. Make sure the water source is cut off to prevent water overflow.
3.Empty the toilet tank: Open the toilet tank lid and completely empty the water in the toilet tank. This can be done by pressing and holding the toilet's flush button for a few seconds or using a sponge or water vacuum to remove the water.
4.Remove the old toilet flush valve: Use a wrench or pliers to loosen the nut on the old toilet flush valve. Note that sometimes a different-sized nut wrench may be required. Rotate the nut to completely detach the old toilet flush valve from the toilet tank.
5.Clean and inspect the toilet tank: Before installing the new toilet flush valve, it is recommended to clean the interior of the toilet tank. If there are any blockages or dirt, use detergent and a cleaning brush to clean the toilet tank.
6.Install the new toilet flush valve: Install the new toilet flush valve according to the instructions on the packaging. Ensure that the toilet flush valve is securely connected to the toilet tank and use the nut to secure it.
7.Connect the water supply pipe: Connect the new toilet flush valve to the toilet's water supply pipe. Make sure the connection sizes match and tighten the nut to prevent water leakage.
8.Turn on the water supply valve: After installation is complete, turn on the water supply valve near the toilet. Gradually open the supply valve to restore water flow.
9.Check and adjust: Open the toilet tank lid and check the operation of the toilet flush valve. If the water flow is too small or too large, adjust the height or flow rate of the flush valve as needed.
10.Test and maintain: Close the toilet tank lid, press the flush button, and test the toilet flush valve's normal operation. Regularly check the operation of the toilet flush valve and perform maintenance or replacement as needed.
Overall, replacing a toilet flush valve is not complicated and only requires some basic tools and patience. By following the above tips, you can ensure a smooth replacement process and the normal functioning of the toilet flush valve. If you are unfamiliar with this process or feel unsafe, it is best to seek assistance from a professional plumber.